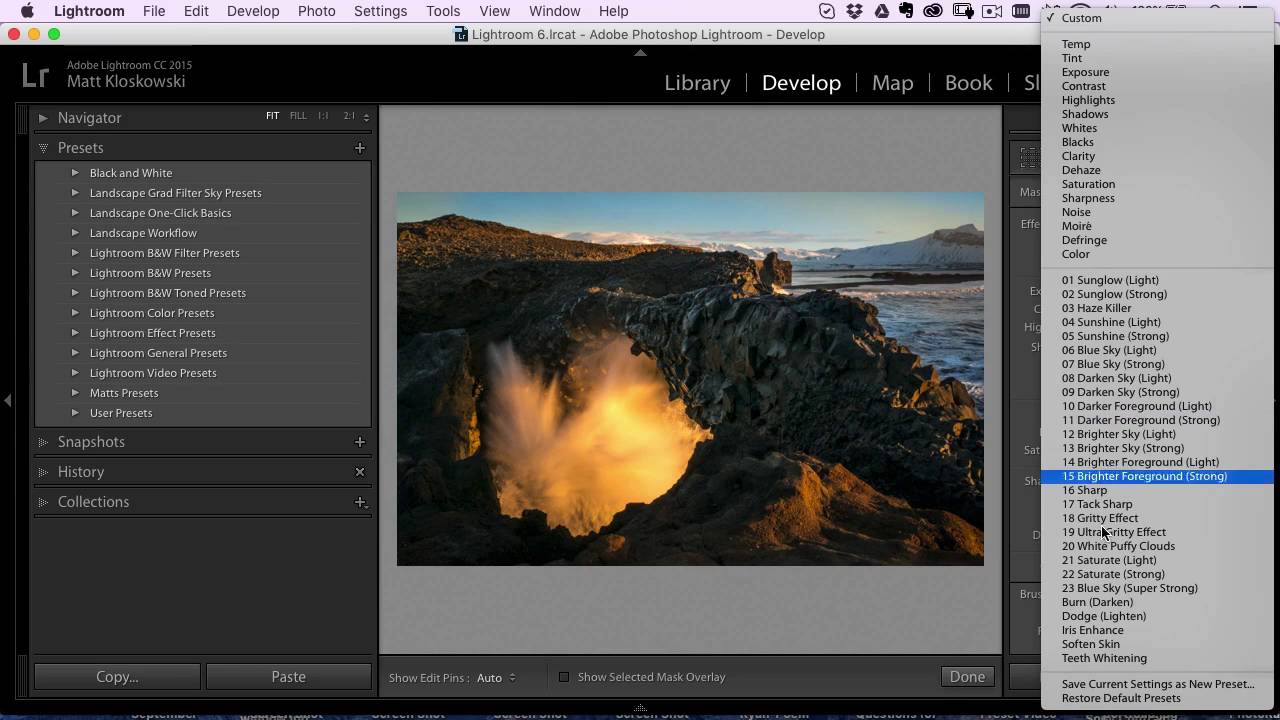
If you’ve ever handed a client a gallery and thought “I wish every shot had that look baked in from the start,” presets are the answer. The problem isn’t finding presets. The problem is that the installation process trips people up every single time, usually at the worst moment, right before a deadline. I’ve watched junior retouchers in my studio waste twenty minutes trying to drag a zip file directly into Lightroom and wondering why nothing happened. In this KelbyOne tutorial, Matt Kloskowski walks through the full installation and basic organization process clearly and without wasted motion. It’s a short video, but it’s the kind of thing that saves you a support call.
Watch the full tutorial on YouTube
I run a post-production consultancy and presets are a core part of how I keep color treatments consistent across campaigns. Getting them installed correctly the first time, named intelligently, and placed in the right module is not glamorous work, but it compounds. Here’s the exact process Matt covers, with a few things I’d add from my own workflow.
Step 1: Unzip the Preset File Before You Do Anything Else
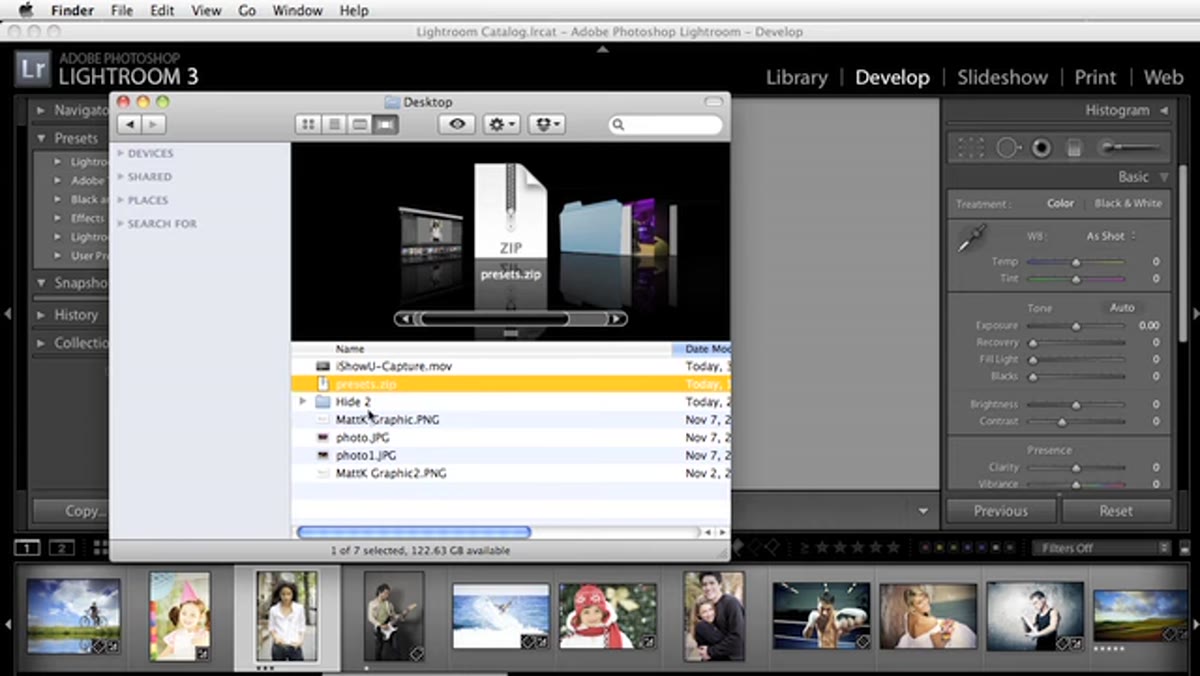 Zip file and unzipped preset folder side by side in Finder
Lightroom cannot read a zip archive. Full stop. You need to extract the contents first. On both Mac and Windows, double-clicking the zip file is usually enough to create a new folder containing the actual preset files. Those files will carry an
Zip file and unzipped preset folder side by side in Finder
Lightroom cannot read a zip archive. Full stop. You need to extract the contents first. On both Mac and Windows, double-clicking the zip file is usually enough to create a new folder containing the actual preset files. Those files will carry an .lrtemplate or .xmp extension depending on your version of Lightroom. Do not try to import the zip file itself. This is the single most common mistake, and it produces an error message that gives you no useful information about what actually went wrong.
Once you have the unzipped folder sitting somewhere easy to find, like your Desktop or a dedicated Presets folder in your project directory, you’re ready to move into Lightroom.
Step 2: Navigate to the Develop Module and Locate the Presets Panel
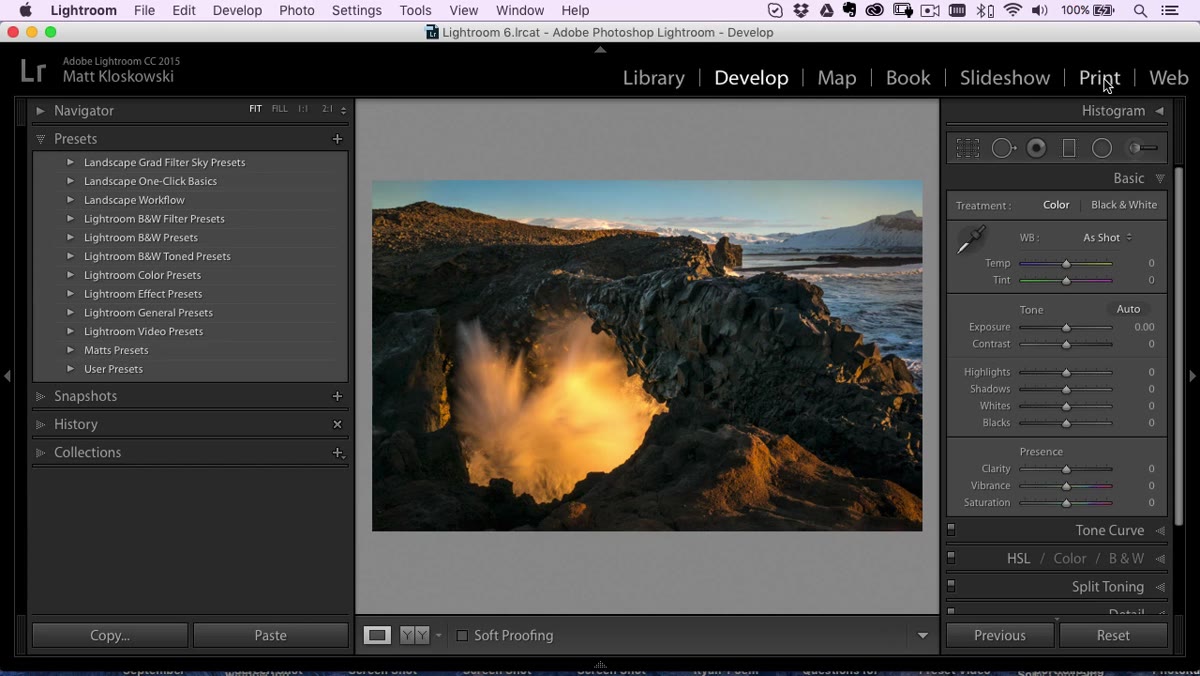 Lightroom Develop module with Presets panel visible on left
Presets installed in the Develop module only appear in the Develop module. This sounds obvious until you’re in the Slideshow module wondering where your preset went. Make sure you’re in the right place before you start importing. In the Develop module, look at the left panel. You’ll see a Presets section with folders listed underneath it, including a “User Presets” folder that holds anything you’ve added yourself.
Lightroom Develop module with Presets panel visible on left
Presets installed in the Develop module only appear in the Develop module. This sounds obvious until you’re in the Slideshow module wondering where your preset went. Make sure you’re in the right place before you start importing. In the Develop module, look at the left panel. You’ll see a Presets section with folders listed underneath it, including a “User Presets” folder that holds anything you’ve added yourself.
If you’re working with print templates or web layouts, those live in their respective modules under a folder called “User Templates” instead. The import process is identical, but the location matters. Get in the habit of confirming your module before importing.
Step 3: Right-Click on “User Presets” to Import
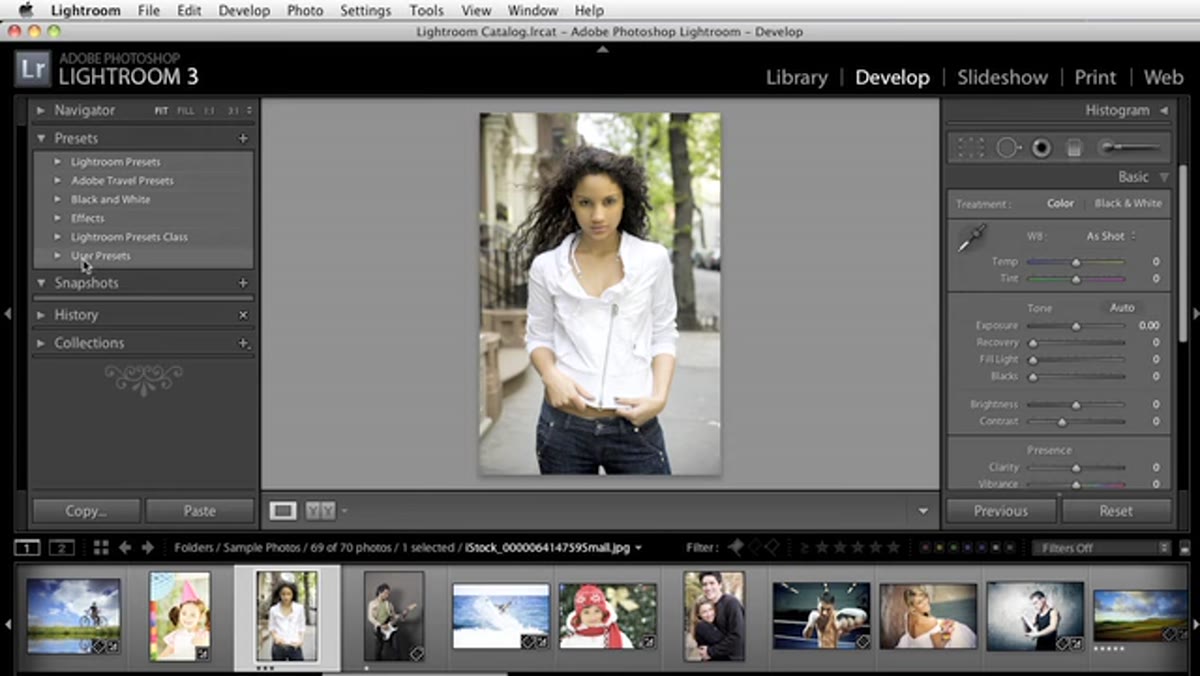 Right-click context menu open on User Presets folder
Right-click directly on the “User Presets” folder label in the left panel. A context menu will appear with an “Import” option. Click that, then navigate to the unzipped folder containing your presets. Select the files you want to bring in and hit Import. The presets will appear immediately inside the User Presets folder, sorted alphabetically. No Lightroom restart required.
Right-click context menu open on User Presets folder
Right-click directly on the “User Presets” folder label in the left panel. A context menu will appear with an “Import” option. Click that, then navigate to the unzipped folder containing your presets. Select the files you want to bring in and hit Import. The presets will appear immediately inside the User Presets folder, sorted alphabetically. No Lightroom restart required.
One important detail: right-clicking on the “Lightroom Presets” folder, which sits above User Presets, will not give you the same import option. It has to be User Presets specifically. If you right-click in the wrong spot and don’t see Import in the menu, that’s why.
Step 4: Alternative Method - Double-Click the Preset File Directly
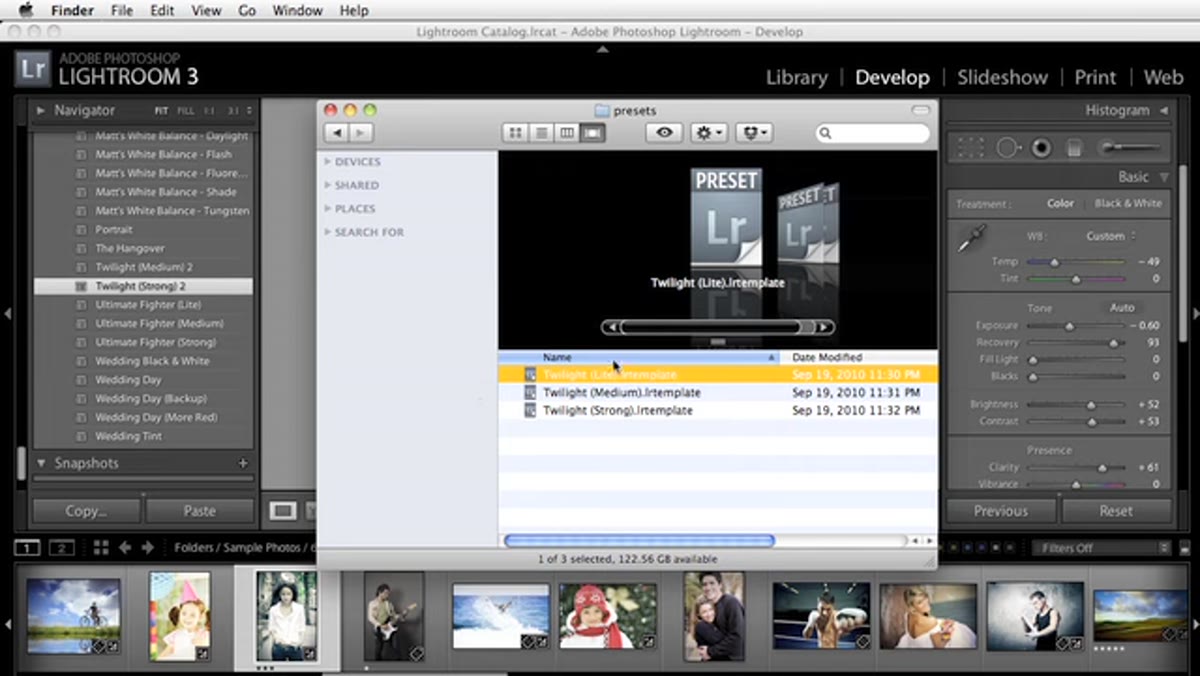 macOS dialog asking which application to open the .lrtemplate file
If you prefer to skip the in-app import dialog, you can double-click any
macOS dialog asking which application to open the .lrtemplate file
If you prefer to skip the in-app import dialog, you can double-click any .lrtemplate or .xmp file directly from your file browser. The first time you do this, your operating system will probably say it doesn’t know what application to use. Point it at Lightroom. After that initial association is set, every future double-click on a preset file will trigger a Lightroom dialog asking if you’d like to install it. Confirm, and it shows up in your presets panel automatically.
Matt mentions this as an alternative rather than his primary method, and I’d agree. For installing a single preset it’s fine, but when you’re bringing in a folder of twenty presets at once, the right-click import inside Lightroom is faster.
Step 5: Verify the Install and Preview the Effect
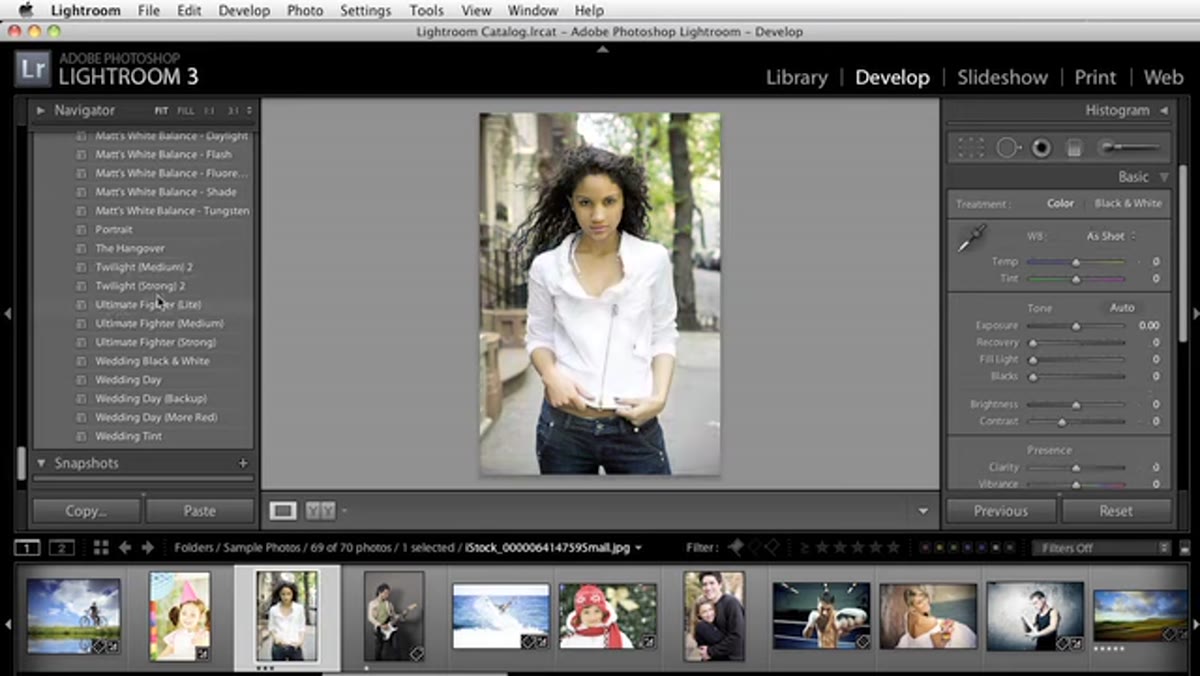 Newly installed preset appearing in User Presets list in Develop module
After importing, click on any preset name in the panel. With a photo open in the Develop module, hovering over a preset name shows a live preview in the Navigator panel at the top left. Click the preset to apply it. If your photo looks radically different, the preset is working. If nothing changes, check that you actually have a photo selected in the Filmstrip at the bottom of the screen. Lightroom won’t throw an error, it just quietly does nothing.
Newly installed preset appearing in User Presets list in Develop module
After importing, click on any preset name in the panel. With a photo open in the Develop module, hovering over a preset name shows a live preview in the Navigator panel at the top left. Click the preset to apply it. If your photo looks radically different, the preset is working. If nothing changes, check that you actually have a photo selected in the Filmstrip at the bottom of the screen. Lightroom won’t throw an error, it just quietly does nothing.
Use the Reset button at the bottom of the right panel to return to the original state if you’re just testing. It’s worth running through a few presets on the same image to understand the range of what you’ve installed before you start using them on client work.
Step 6: Organize Presets Alphabetically Using Naming Prefixes
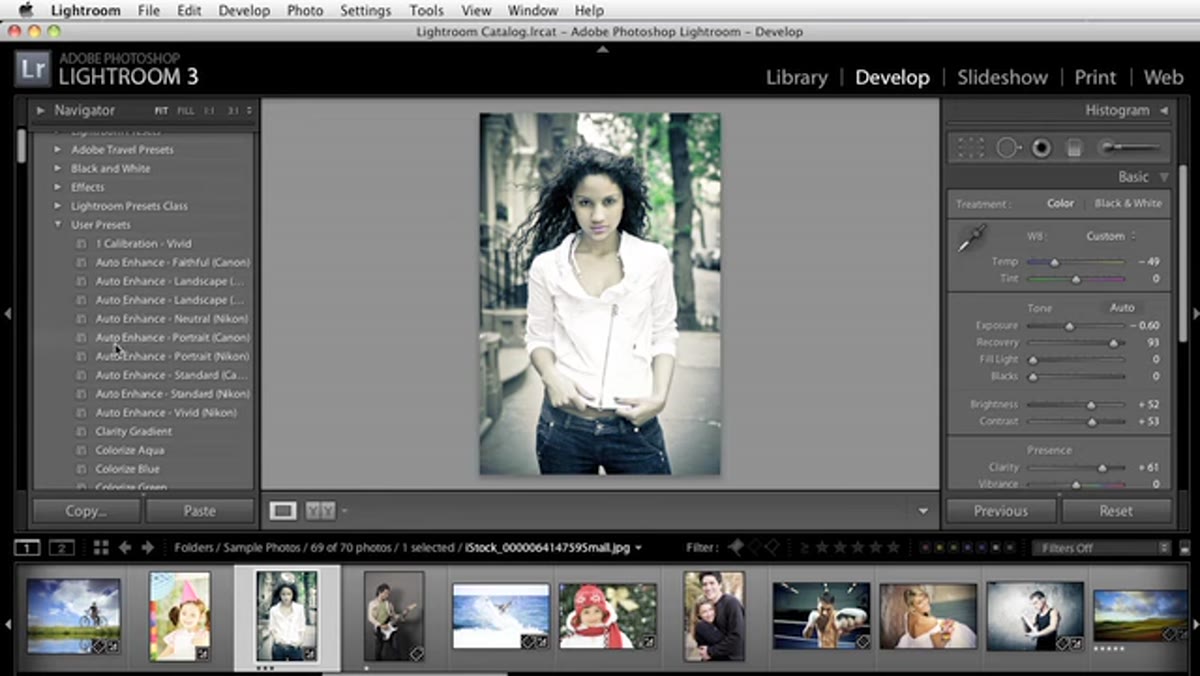 Preset list showing numbered prefixes to control sort order
Lightroom organizes presets alphabetically, and you can exploit that. If you have a preset you want at the top of the list but its name starts with something other than A, put a “1” or “01” in front of the name. A preset called “01 - Base Exposure” will always appear before “Cinematic Blue” regardless of anything else. Use “02,” “03,” and so on to build a priority order that matches how you actually work.
Preset list showing numbered prefixes to control sort order
Lightroom organizes presets alphabetically, and you can exploit that. If you have a preset you want at the top of the list but its name starts with something other than A, put a “1” or “01” in front of the name. A preset called “01 - Base Exposure” will always appear before “Cinematic Blue” regardless of anything else. Use “02,” “03,” and so on to build a priority order that matches how you actually work.
For campaign-based work, I prefix preset folders with client initials followed by a number. Every preset for a specific brand stays grouped and sorted at the top of its own hierarchy. It takes thirty seconds to set up and saves the mental overhead of scanning a long list every session.
What I’d Add From My Own Workflow
Matt’s tutorial covers the mechanics perfectly. The thing I’d layer on top is a folder structure that lives outside Lightroom entirely. I keep a single “Presets Library” folder on my NAS (backed up in two other places, naturally) organized by category and date acquired. Before I install anything into Lightroom, I copy the unzipped files into that library. That way, if I ever need to reinstall Lightroom or move to a new machine, I’m not hunting for preset files I imported two years ago. The Lightroom catalog and the presets folder are two different things, and people often forget that when they migrate systems.
If you’re running any kind of volume, even fifty shoots a year, this ten-minute setup pays for itself the first time you do a system migration without panicking.
The single most important thing from this tutorial is something that sounds almost too simple: unzip before you import, and make sure you’re in the correct module. Those two things account for the majority of preset installation failures I’ve ever seen. Everything else is just organization.
Watch the full tutorial on YouTube to see Matt walk through the live install in real time. It’s worth the ten minutes even if you think you already know the process.
Comments (2)
I keep coming back to this article. It's that useful.
This is the kind of content that keeps me coming back.
Leave a Comment