
E-commerce clients don’t care about scaffolding. They don’t care about the stray tripod leg that crept into the corner of your shot, or the shadow a light stand threw across an otherwise clean background. They care about the product, the model, the scene. Everything else is noise, and removing that noise used to eat serious time. I’ve had jobs where cleanup work accounted for nearly a third of my total post-production hours. That’s a number I’ve been trying to shrink for years.
This PHLEARN tutorial from the Watch the full tutorial on YouTube channel changed how I think about that problem. It’s a two-minute walkthrough that covers not one but two distinct approaches to distraction removal using Photoshop’s Generative Fill, and the distinction between them is actually worth understanding before you just start painting over things randomly.
The short version: one approach works well for isolated, smaller distractions. The other is the move when your entire background needs rebuilding. Knowing which tool to reach for saves you from generating mediocre results and wondering why AI “doesn’t work.”
Step 1: Grab the Selection Brush Tool
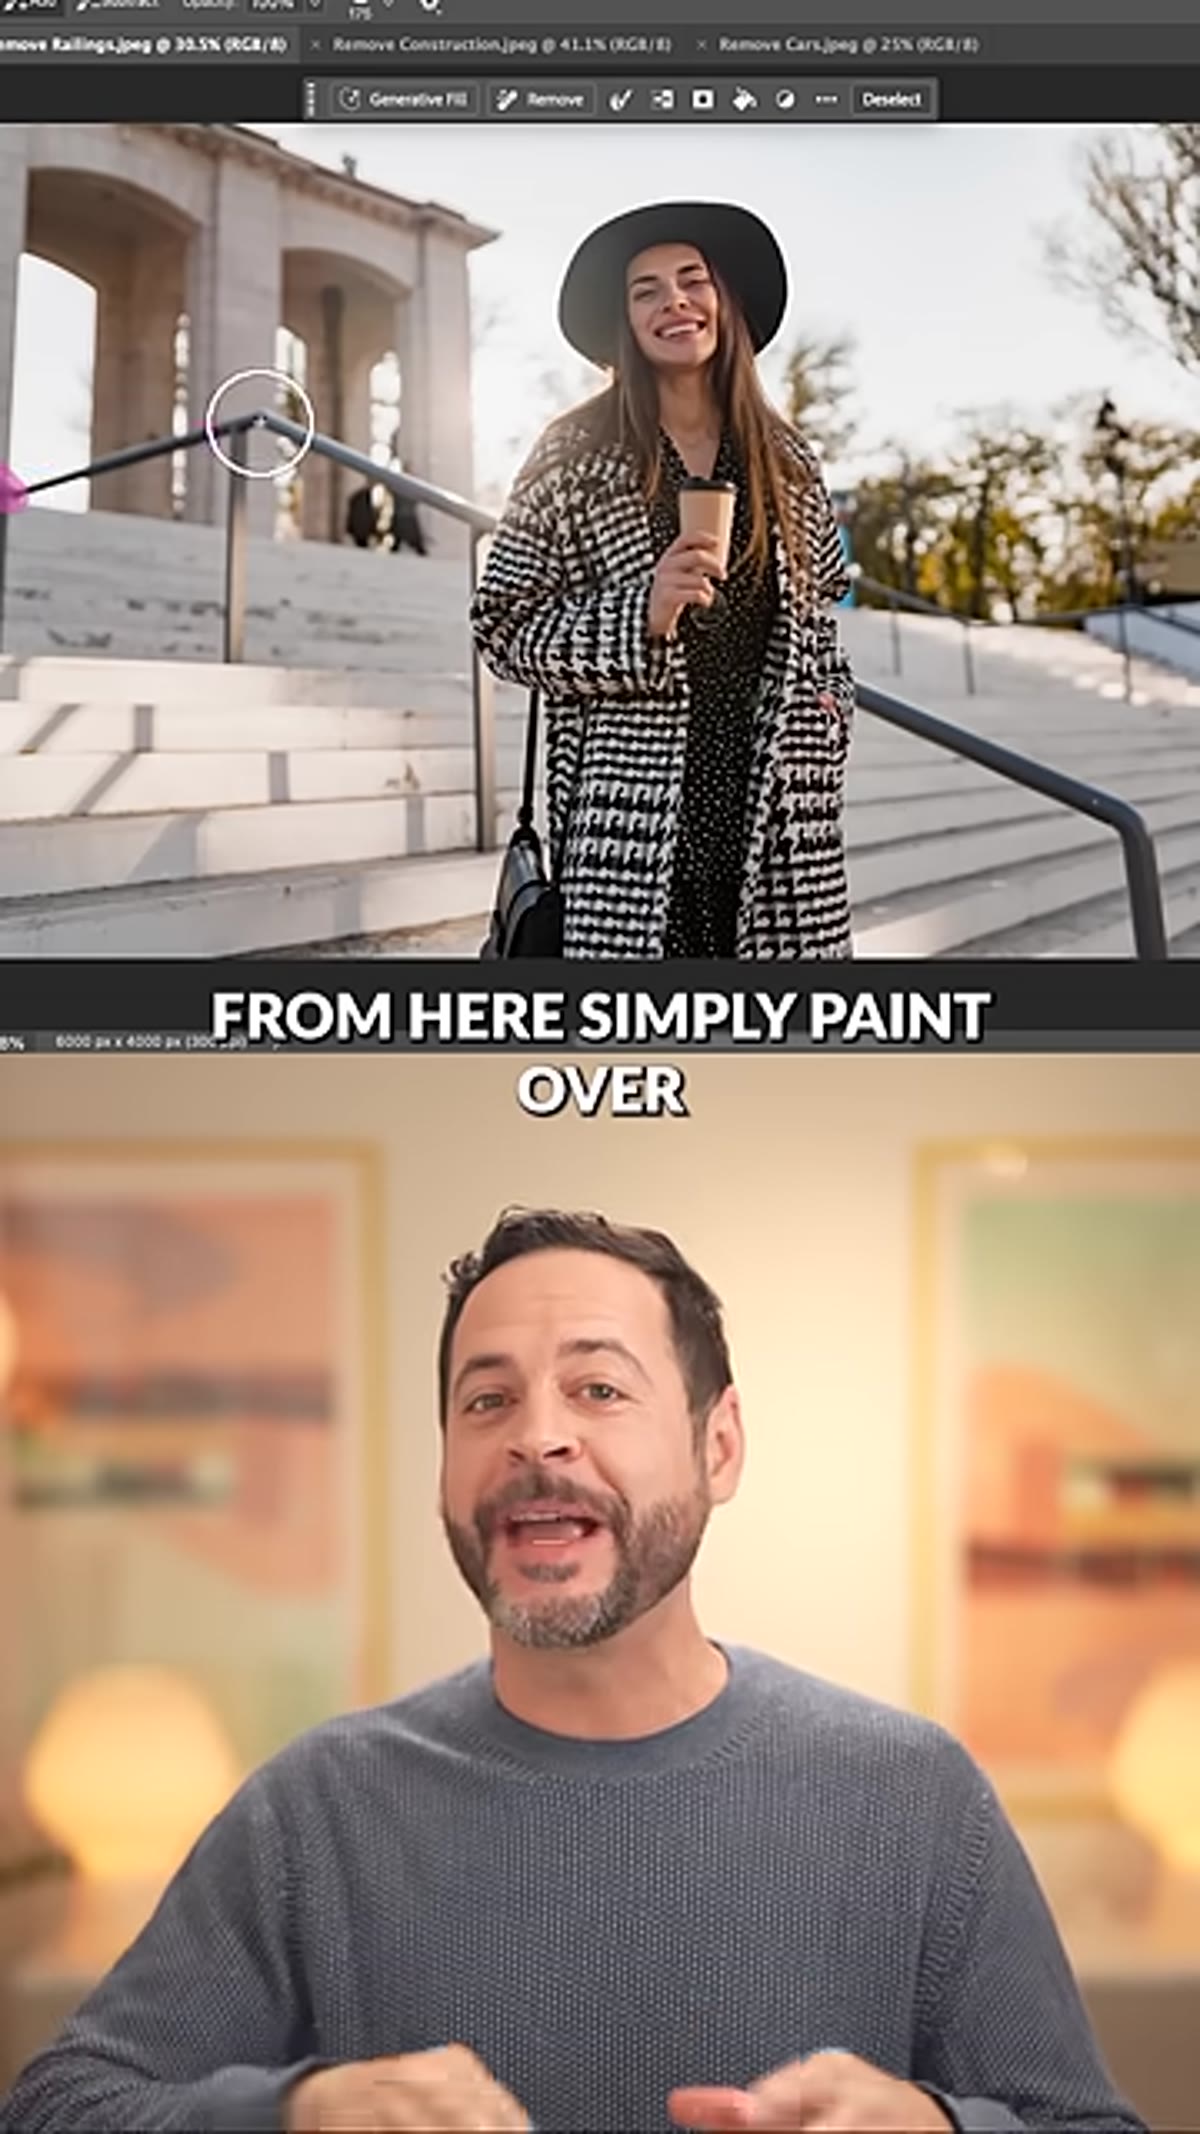 Selection Brush Tool highlighted in Photoshop toolbar
Open your image and go straight to the Selection Brush tool. This is your primary selection instrument for this technique, and the reason it works so well here is that it’s fast and forgiving. You’re not trying to make a surgical, pixel-perfect selection. You’re painting a rough mask over the thing you want gone.
Selection Brush Tool highlighted in Photoshop toolbar
Open your image and go straight to the Selection Brush tool. This is your primary selection instrument for this technique, and the reason it works so well here is that it’s fast and forgiving. You’re not trying to make a surgical, pixel-perfect selection. You’re painting a rough mask over the thing you want gone.
Work loosely but intentionally. Cover the full footprint of the distraction, including any shadow it casts. Shadows are the part people forget, and a floating shadow with no object above it looks worse than the original problem.
Step 2: Paint Over Your Distractions
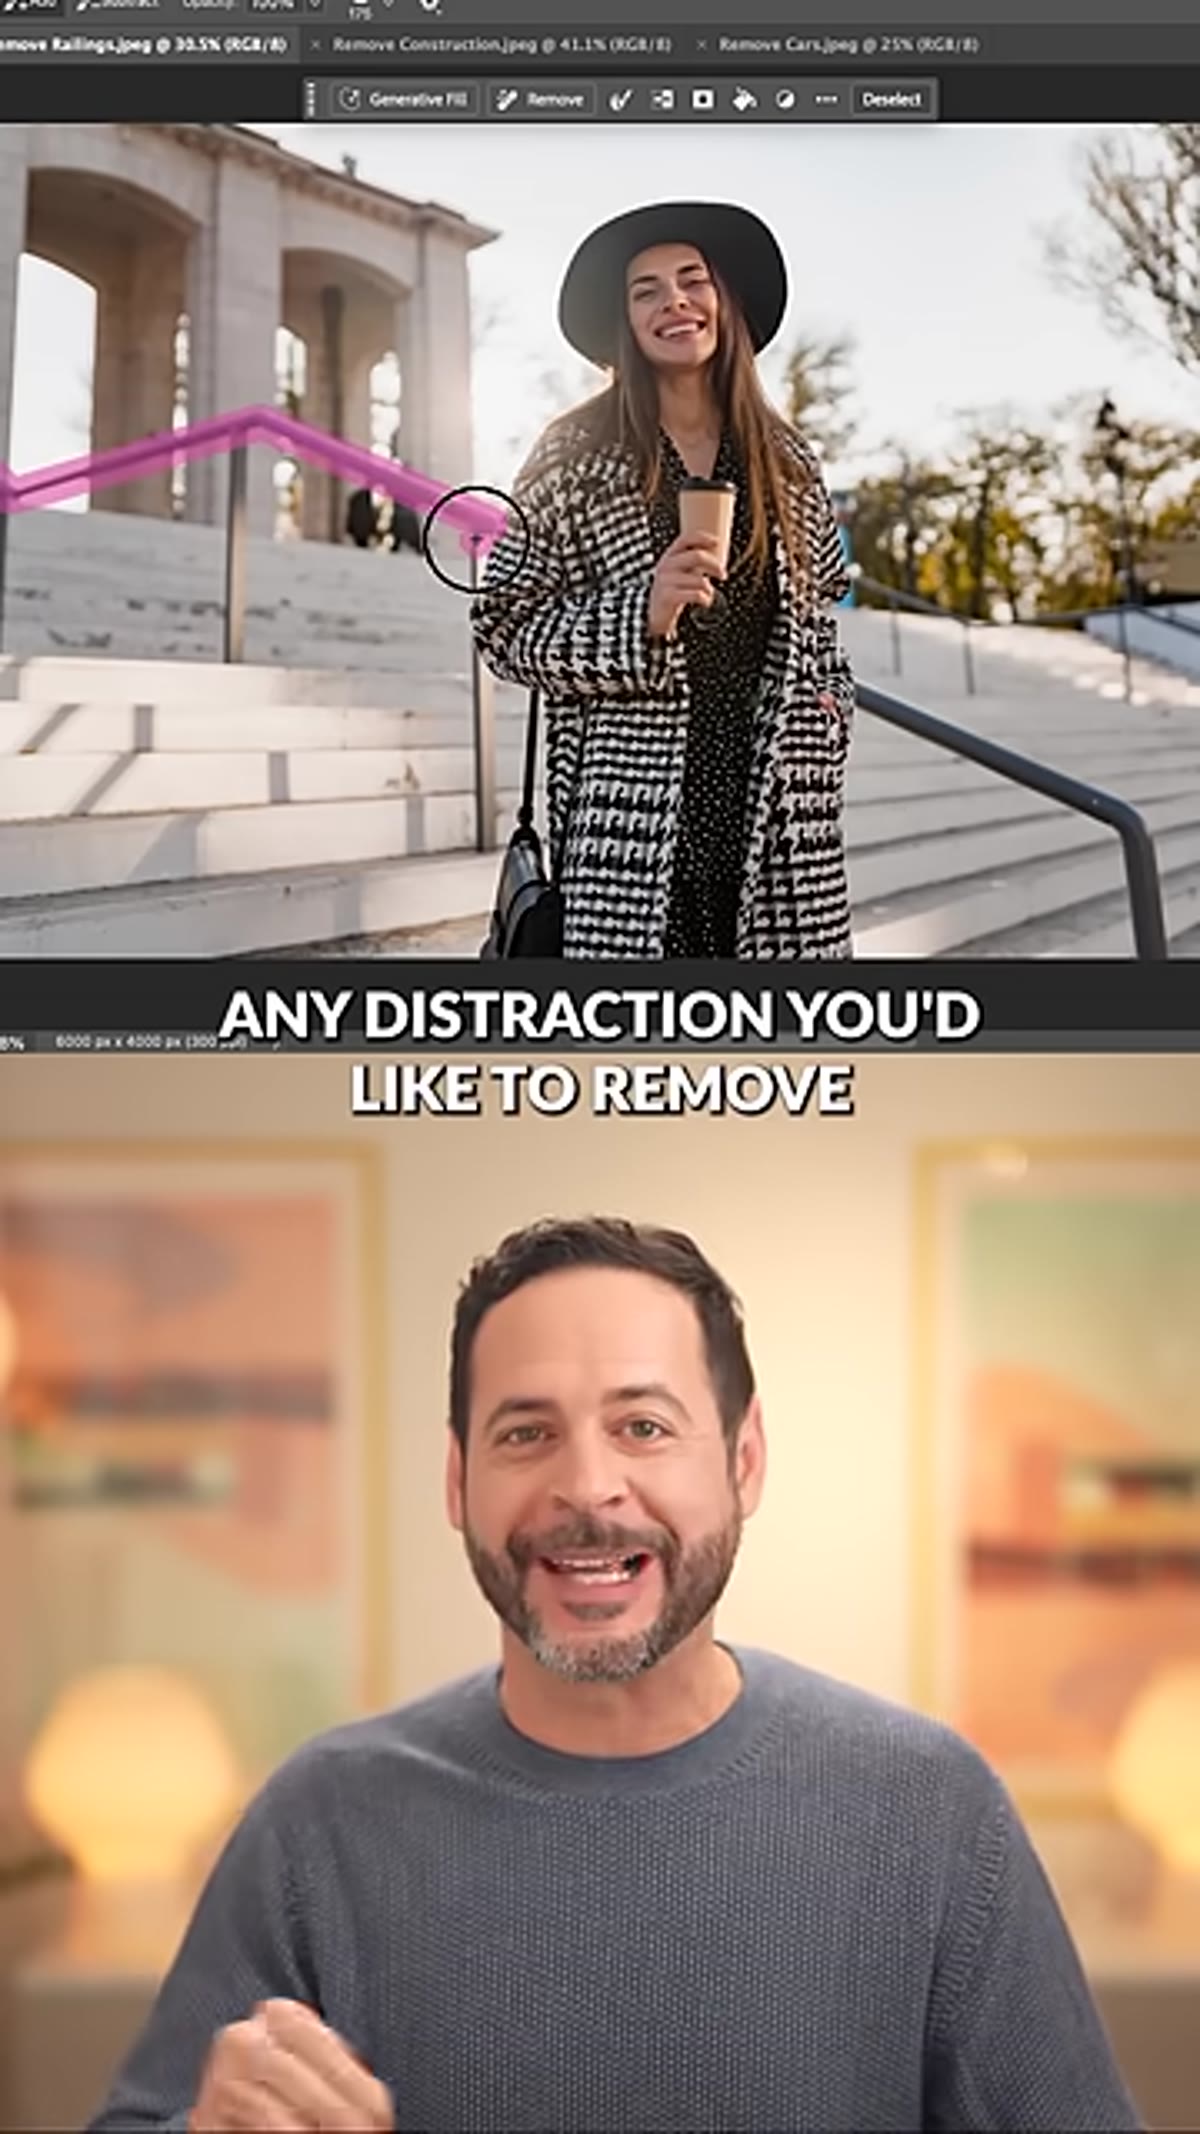 Brush painting over distraction area in the image
With the Selection Brush active, paint directly over every element you want removed. If you have multiple objects scattered across the frame, cover all of them in this pass. The selection doesn’t need clean edges. Generative Fill is smart enough to interpret a rough selection and understand the context of the surrounding pixels.
Brush painting over distraction area in the image
With the Selection Brush active, paint directly over every element you want removed. If you have multiple objects scattered across the frame, cover all of them in this pass. The selection doesn’t need clean edges. Generative Fill is smart enough to interpret a rough selection and understand the context of the surrounding pixels.
For images with distinct shadows, treat each shadow as part of the object itself. Paint over both. A good mental model: if light touching that object creates any artifact on your background, that artifact is part of the “distraction” and belongs inside your selection.
Step 3: Run Generative Fill with Firefly Image Model 3
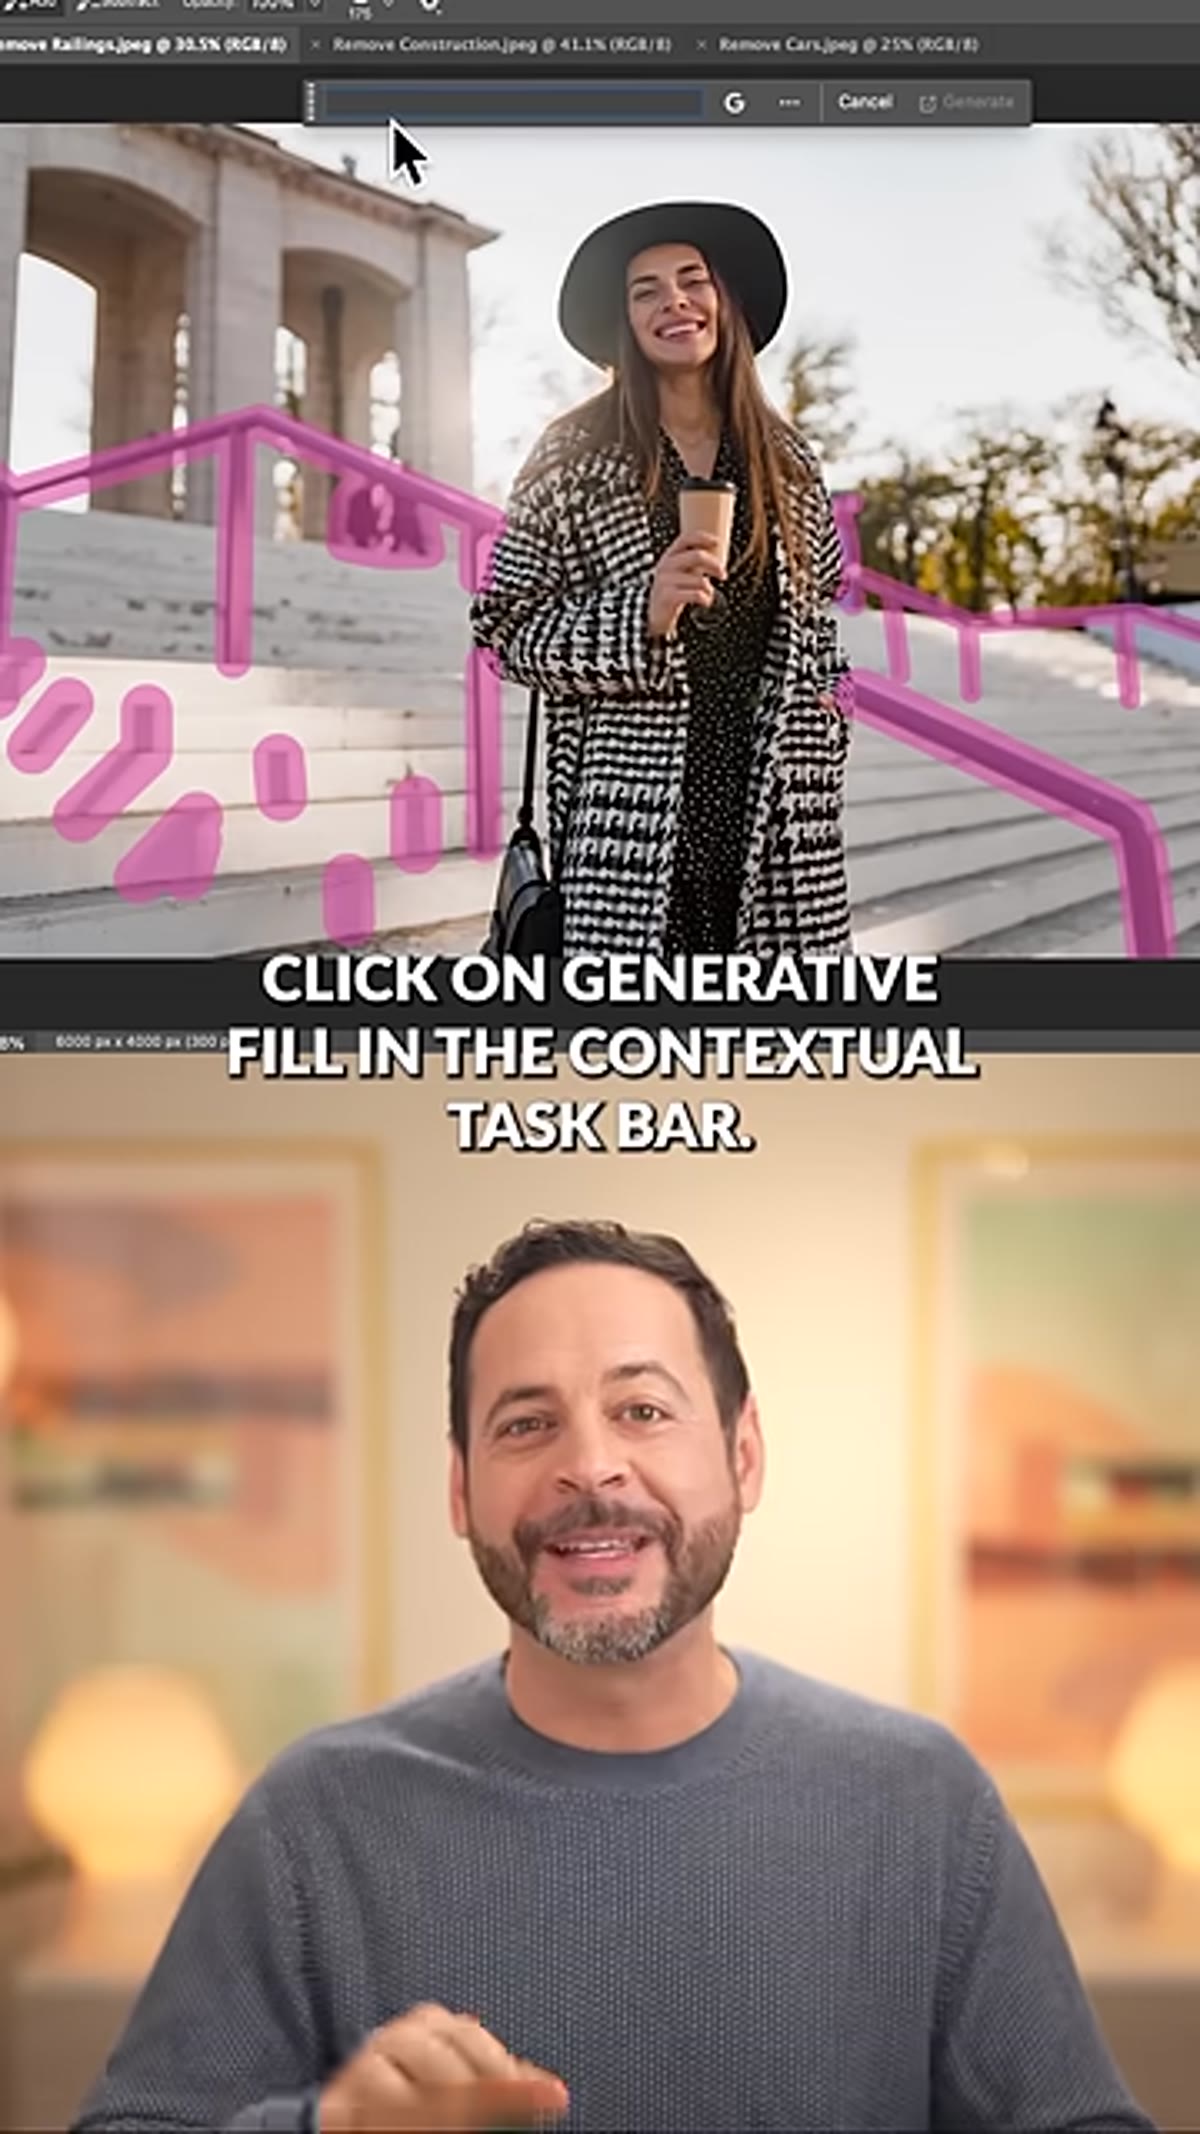 Generative Fill button in contextual taskbar
Once your selection is painted, look at the contextual taskbar at the bottom of your canvas. Click Generative Fill. Before you hit generate, check your model selector and choose Firefly Image Model 3. This is currently Adobe’s strongest model for photorealistic fill work, and the difference between model versions is not cosmetic. The newer model handles complex textures, like pavement, grass, or architectural detail, significantly better than older iterations.
Generative Fill button in contextual taskbar
Once your selection is painted, look at the contextual taskbar at the bottom of your canvas. Click Generative Fill. Before you hit generate, check your model selector and choose Firefly Image Model 3. This is currently Adobe’s strongest model for photorealistic fill work, and the difference between model versions is not cosmetic. The newer model handles complex textures, like pavement, grass, or architectural detail, significantly better than older iterations.
Leave the prompt field empty. For removal tasks where you’re not replacing content with something specific, no prompt is actually the right call. You’re telling Photoshop to look at the surrounding context and fill intelligently. Adding a prompt can sometimes pull the result in a direction you didn’t intend.
Step 4: Review Variations and Repeat if Needed
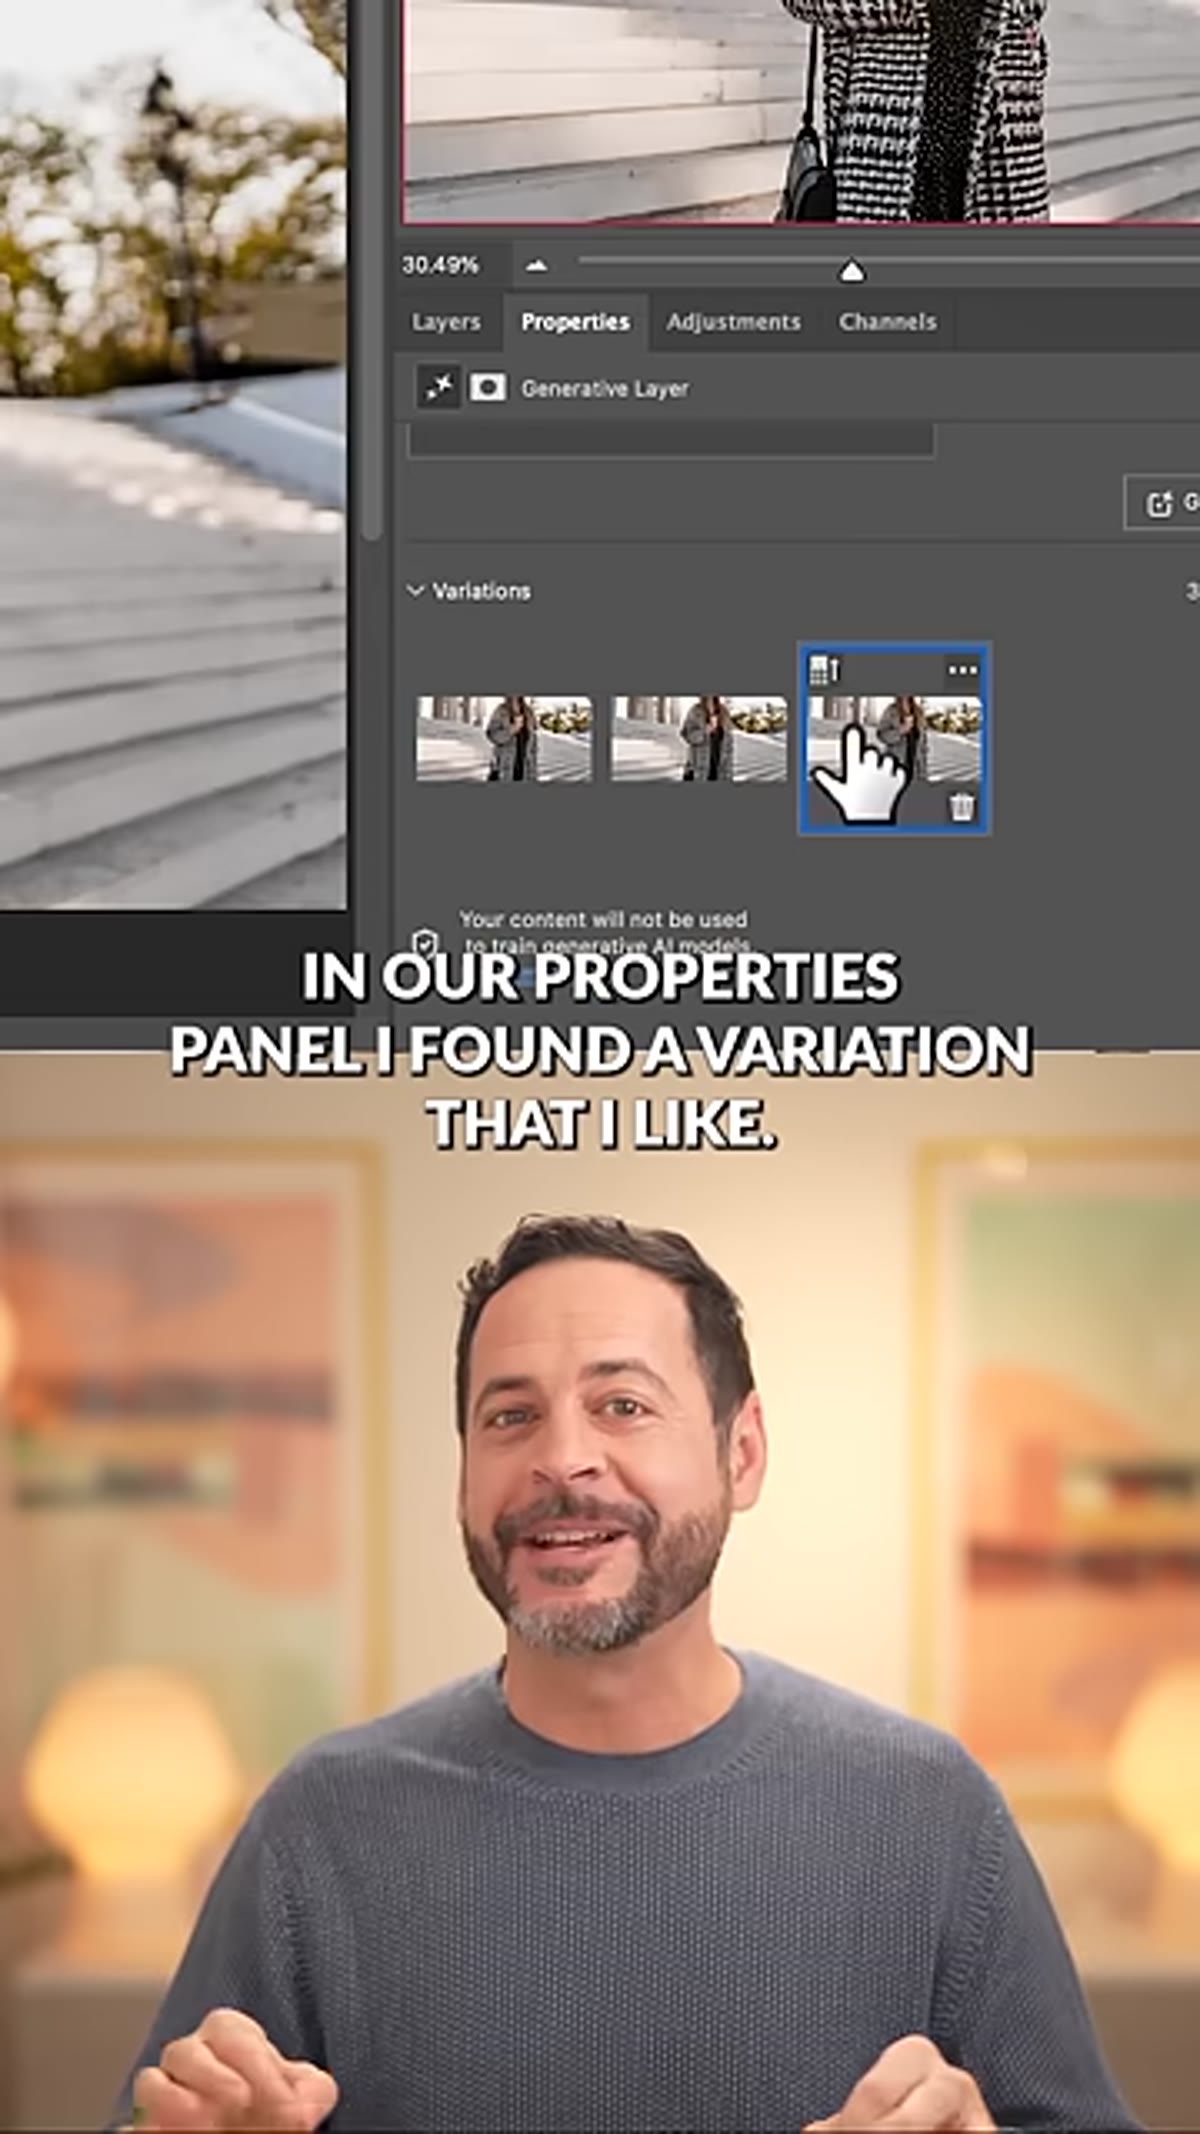 Properties panel showing generated variation options
After generation completes, your Properties panel will show you multiple variations. Flip through them. Don’t just accept the first result by default. Sometimes variation two or three handles a tricky texture transition better than the first pass.
Properties panel showing generated variation options
After generation completes, your Properties panel will show you multiple variations. Flip through them. Don’t just accept the first result by default. Sometimes variation two or three handles a tricky texture transition better than the first pass.
Here’s something the tutorial makes clear that I’ve found true in my own work: the first pass almost never catches everything. Once a major distraction disappears, your eye adjusts and finds the next problem. That’s fine. Simply go back to the Selection Brush, paint over whatever new issue you’re seeing, and run Generative Fill again with no prompt. Each pass is fast. Stack two or three of them and you’re still looking at under five minutes for most images.
Step 5: For Larger Background Problems, Select All First
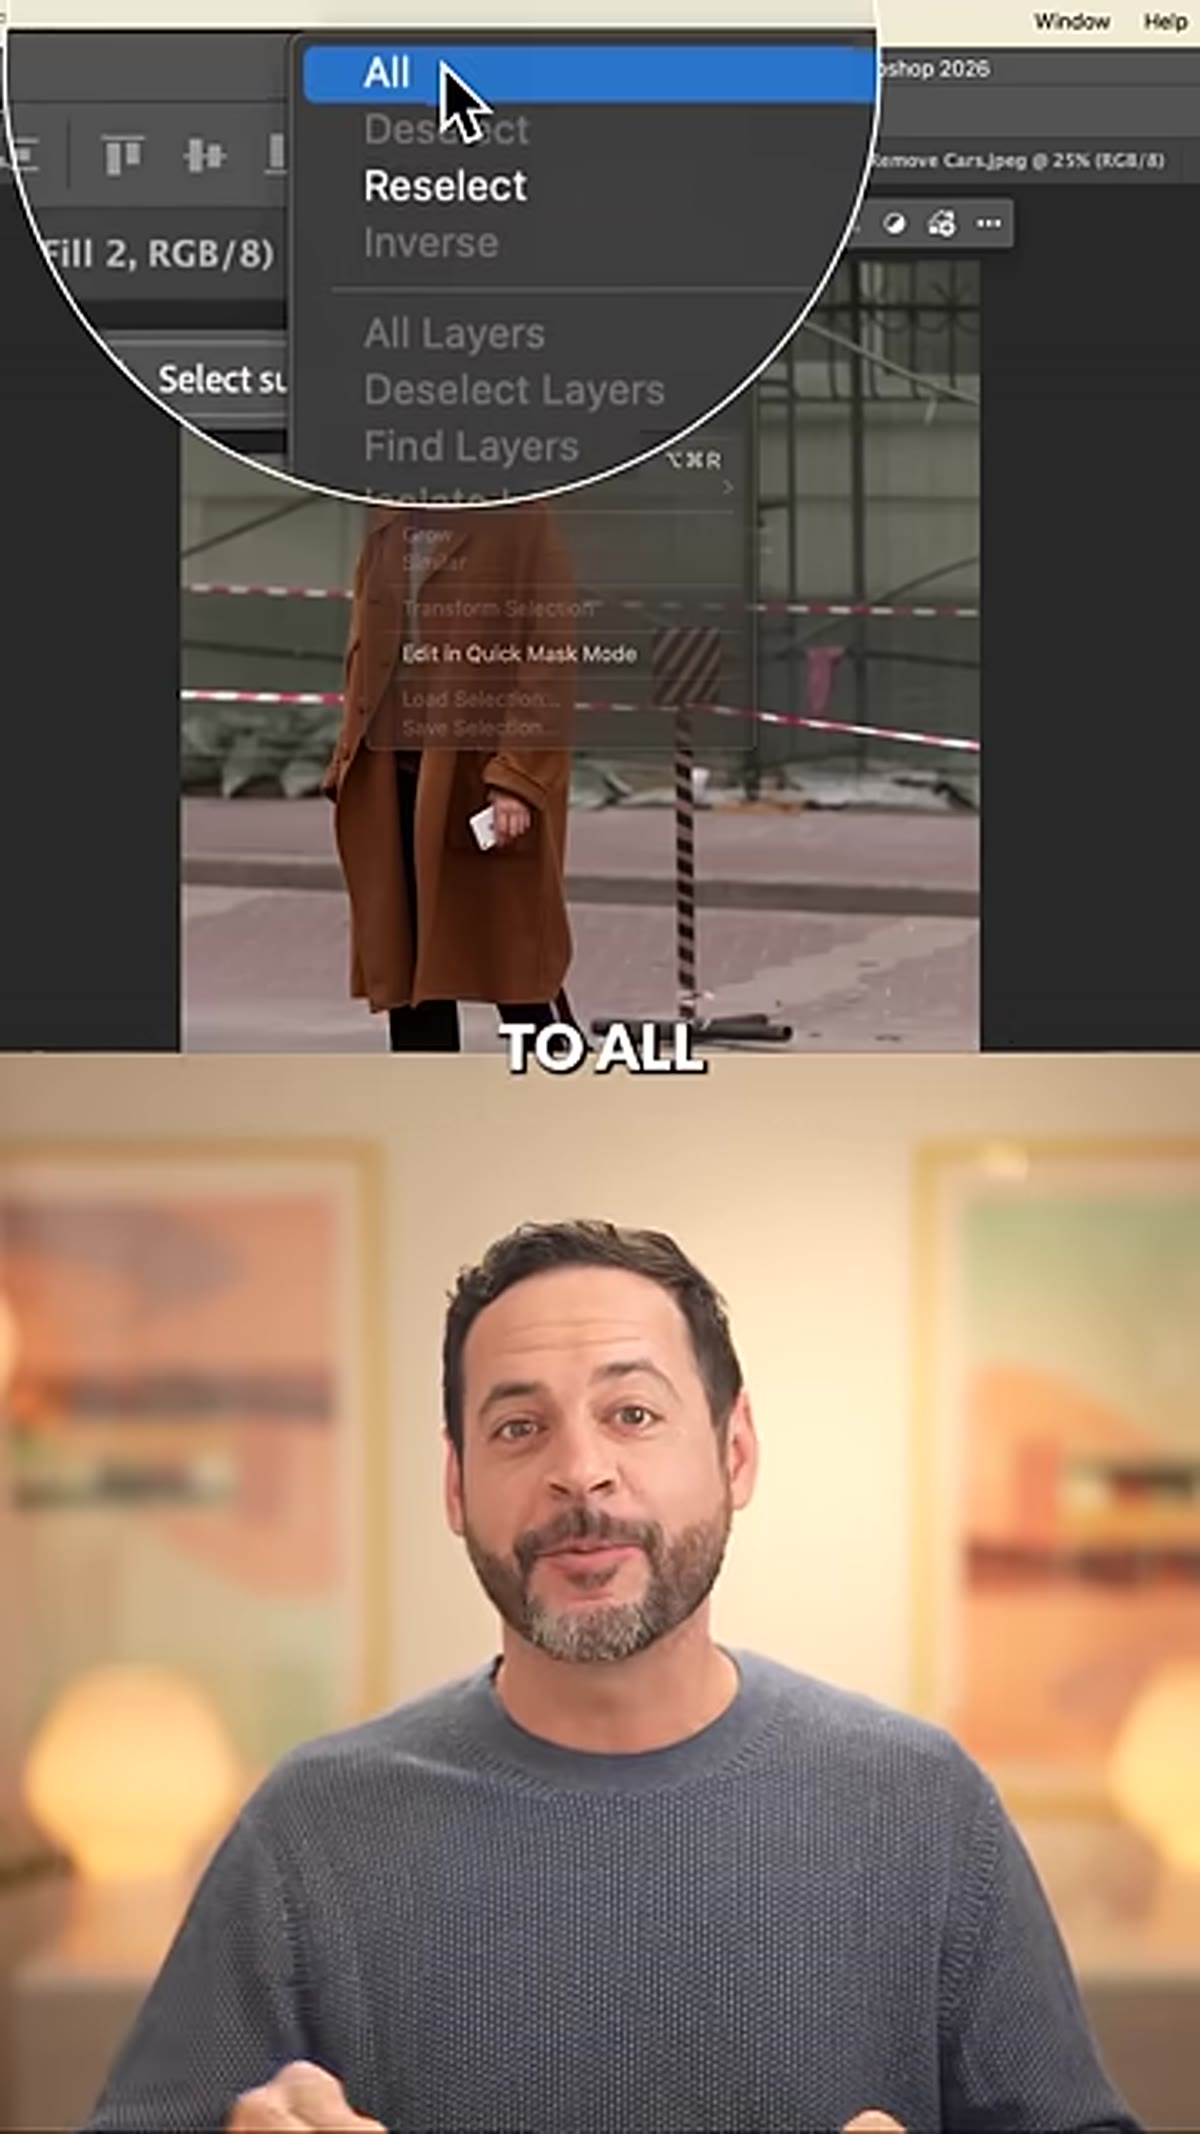 Select All applied to entire image canvas
This is where the tutorial shifts gears, and it’s the insight I found most valuable. When you’re not dealing with a small isolated object but rather an entire background zone that looks wrong after an initial fill, the targeted brush approach hits its ceiling. In the tutorial example, construction scaffolding and equipment had left the background looking vague and unresolved even after a first-pass removal.
Select All applied to entire image canvas
This is where the tutorial shifts gears, and it’s the insight I found most valuable. When you’re not dealing with a small isolated object but rather an entire background zone that looks wrong after an initial fill, the targeted brush approach hits its ceiling. In the tutorial example, construction scaffolding and equipment had left the background looking vague and unresolved even after a first-pass removal.
The fix is counterintuitive: select the entire image. Go to Select, then All. You’re no longer asking Photoshop to patch a hole. You’re asking it to reimagine the full scene.
Step 6: Use a Descriptive Prompt When Selecting the Full Image
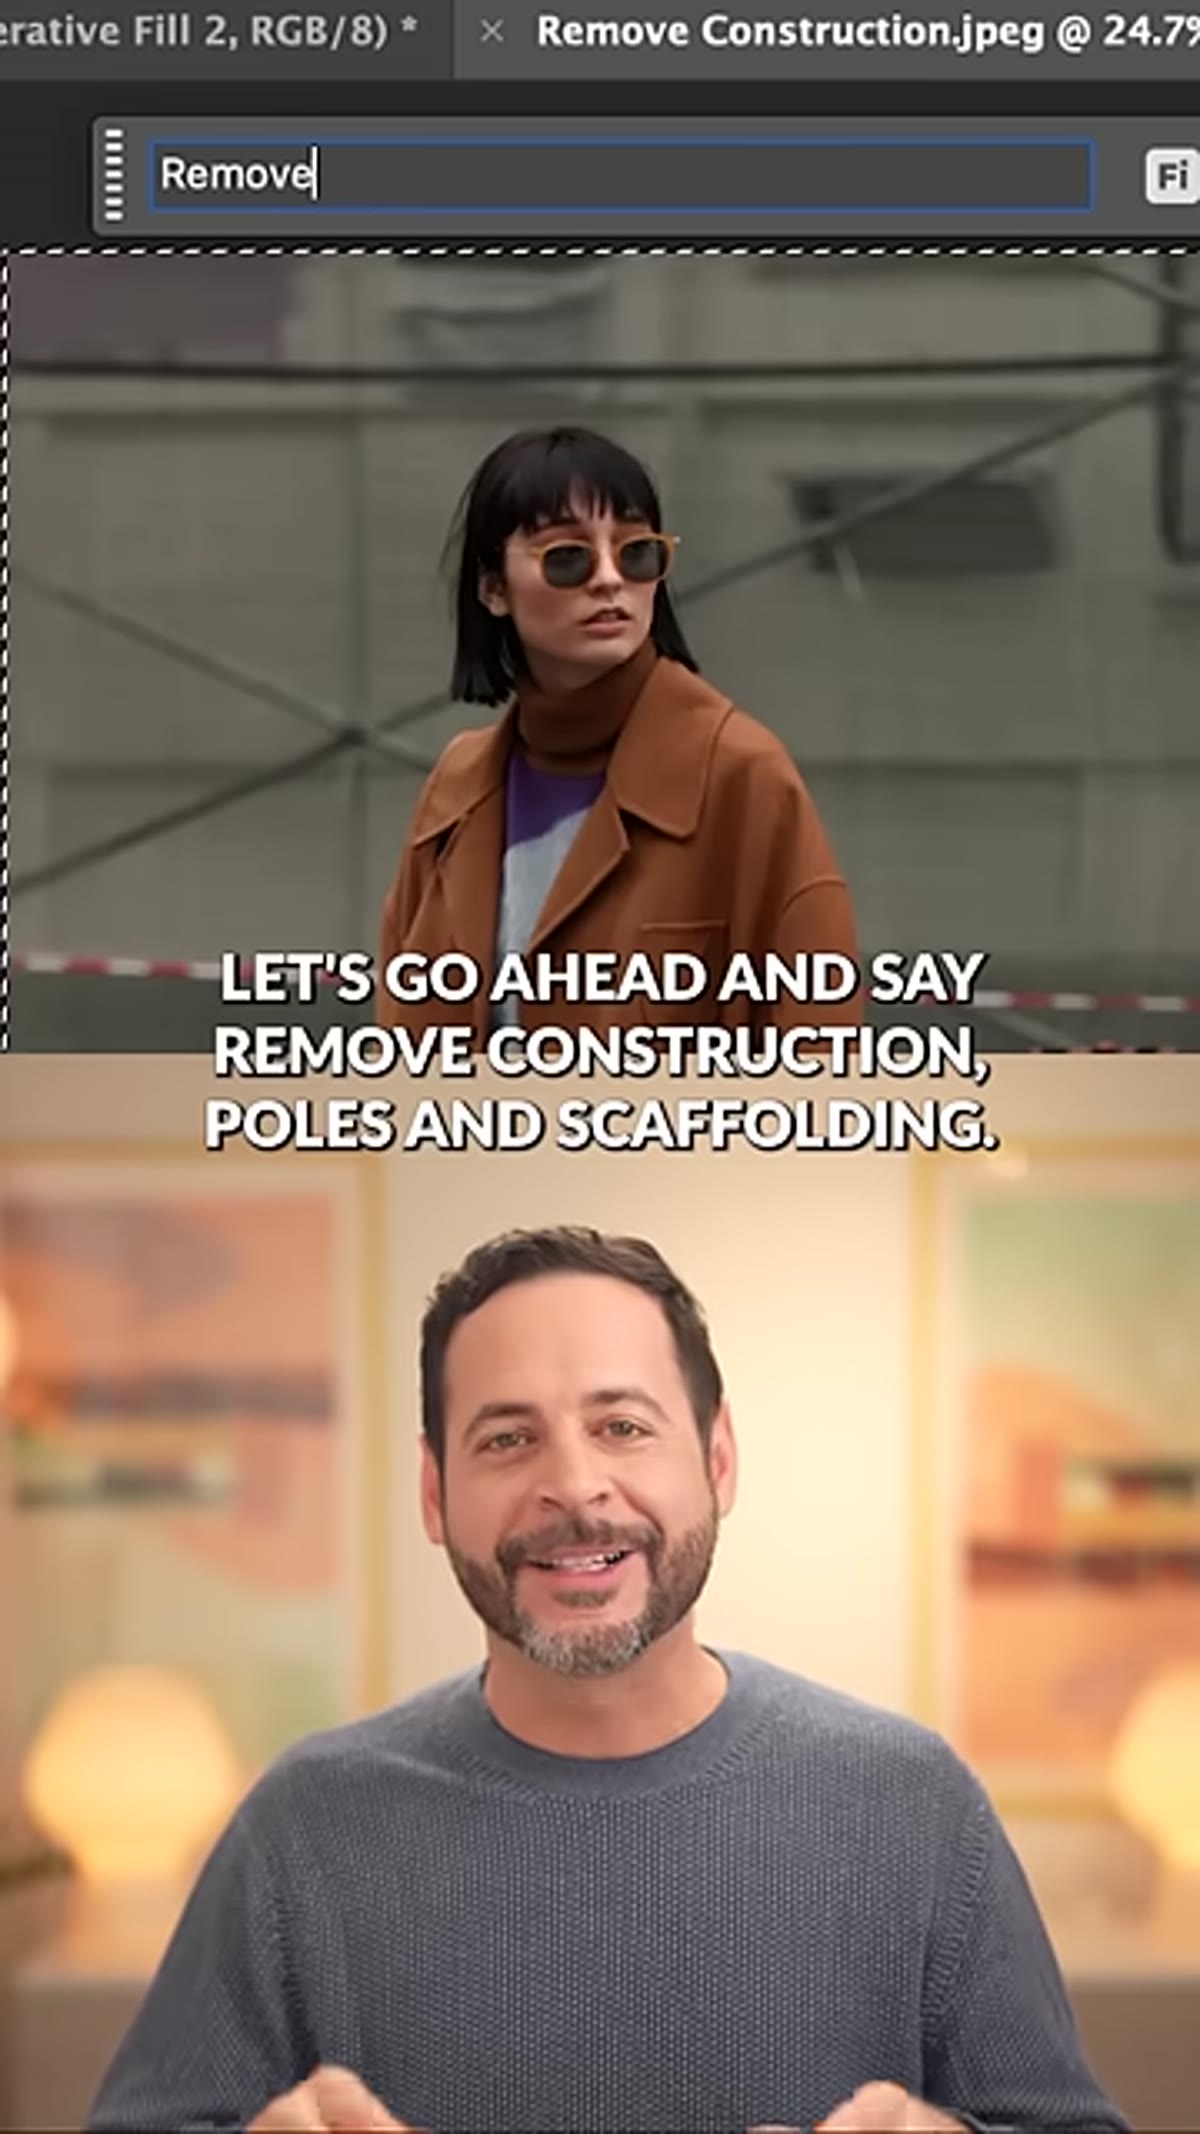 Generative Fill prompt box with descriptive text entered
With the full image selected and Generative Fill open, this time you do want a prompt. Be specific about what you want gone. Something like “remove construction poles and scaffolding” gives the model a clear directive rather than leaving it to guess. The surrounding subject, your model or product or whatever is in the foreground, is preserved, while the background gets rebuilt from scratch based on context and your instruction.
Generative Fill prompt box with descriptive text entered
With the full image selected and Generative Fill open, this time you do want a prompt. Be specific about what you want gone. Something like “remove construction poles and scaffolding” gives the model a clear directive rather than leaving it to guess. The surrounding subject, your model or product or whatever is in the foreground, is preserved, while the background gets rebuilt from scratch based on context and your instruction.
The result is a fully generated background that reads as a coherent environment rather than a patchwork of filled selections. It’s a bigger intervention, but for heavily compromised backgrounds, it’s the cleaner solution.
What I’d Add From My Own Workflow
I work with a lot of on-location product and lifestyle shots for ad agencies, and backgrounds are almost never perfect. Shooting on location saves money for clients but creates cleanup work for me. After watching this tutorial I tested the full-image selection approach on a batch of outdoor shots with busy urban backgrounds, and the Firefly results were consistently strong enough to use without additional manual cleanup in about 70% of cases.
The 30% that needed more work were images where the subject was close to the background edge and the perspective was complex. In those cases I’ll still reach for Content-Aware Fill or clone stamp work as a follow-up pass. Generative Fill is not a complete replacement for manual retouching judgment. It’s a first-pass accelerant, and a very good one.
One practical note on non-destructive workflow: always run Generative Fill on a duplicate layer or use Smart Objects where possible. The generated content lands on its own generative layer automatically, which is great, but your original pixel data should be protected underneath it. If a client asks for a revision three weeks later, you want your untouched original ready to go. I keep my backup drives backed up for exactly this reason.
The single most important takeaway here is the distinction between the two approaches: targeted brush selection for isolated distractions, full-image selection with a prompt for background reconstruction. Reaching for the wrong approach first costs you time and gives you subpar results. Reach for the right one and you’re looking at cleanup times that would have been unthinkable even two years ago.
Watch the full tutorial on YouTube to see both techniques demonstrated back to back in real time. Two minutes well spent.
Comments (2)
Love how you break this into manageable steps instead of one giant wall of text.
Do you have any tips for applying this to landscape work?
Leave a Comment